product Specification
| Input Voltage(V) |
200-240V AC/ 100-277V AC/ 12-24V DC
|
Beam angle
|
120 |
|
Power
|
3-30W
|
Housing
|
Aluminium+PC
|
| Color Temperature(CCT) |
2700-6500K
|
Thickness
|
8mm
|
| Lighting solutions service | Lighting And Circuitry Design, Project Installation, Online technical support |
Energy efficiency
|
>85%
|
| Warranty(Year) | 3-Year |
Operating temperature
|
-40°C a +40°C
|
|
Lumen output
|
>100lm/w
|
Lifespan
|
50.000 horas or more
|
|
Warranty
|
3 years
|
Certificate
|
CE ROHS
|

Core Product Features
Magnificently Brilliant and Eye-Protecting Glow
A light guide panel made of high-quality PMMA (acrylic) is used in the construction of this fixture, which provides lighting that is gentle, consistent, and devoid of glare, making it easy on the eyes. Just a warm, welcoming glow that makes every area seem brighter, more open, and incomparably more comfortable. There is no harsh flashing, and the lighting is equally distributed around the room. Kitchens, offices, bedrooms, and living spaces are all excellent places to put this!
Constructed to Last (And May Help You Save Money!)
Heat dissipation is maximised thanks to the housing's sturdy die-cast aluminium construction, which ensures that the LED components remain cool and continue to function well. This results in an extremely long lifetime, which eliminates the need for frequent bulb changes, eliminates bother, and results in significant cost savings on power bills. Enjoy light that is dependable and constant for many years to come.
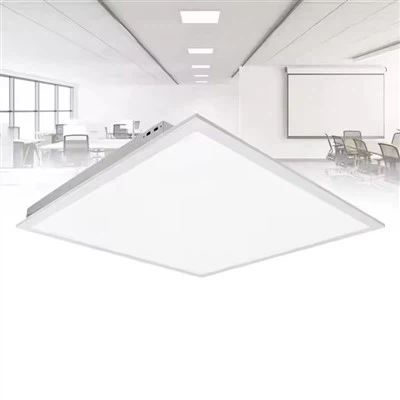
Smooth and Slender Design That Is Adaptable to Any Area
Having an extremely thin profile, this panel light is able to lay flush against the ceiling, so producing a clean and contemporary appearance that is suitable for any kind of interior design, ranging from minimalist to contemporary. It is available in both round and square shapes, and it can be effortlessly integrated into drop ceilings, drywall, or any other recessed opening. Because of this, it may give a touch of refinement to your area without being overpowering.
Core Product Features
Installation that is effortless and causes no stress
It is not necessary to have any intricate wiring or expensive equipment! Within a matter of seconds, the built-in spring clips will snap tightly into the ceiling cutout, so ensuring that the light remains firmly in place. This is a project that is suitable for do-it-yourselfers and can be finished in a matter of minutes since the driver that is supplied can readily connect to your power supply.
Adaptable to Each and Every Room and Situation
In the event that you are looking to improve the appearance of your house, business, retail shop, or hotel, this panel light is the very best option. Because of its uncluttered, uncluttered appearance and even lighting, it is an excellent choice for establishments such as kitchens, bathrooms, corridors, classrooms, and commercial areas. It offers dependable illumination wherever it is required.


Step-by-Step Installation Guide – Get Your Light Up in Minutes!
What You'll Need:
Your new LED panel light + driver
Screwdriver (if needed)
Wire strippers (if your wires aren't pre-stripped)
Safety gloves and goggles (always prioritize safety!)
Step 1: Prep the Area & Power
Turn off the power to the ceiling circuit at your home's main electrical panel. Double-check with a voltage tester to confirm the power is off-safety first!
Confirm your ceiling cutout matches the light's required opening size (refer to the product specs). Clear the area around the opening to give yourself room to work.
Step 2: Wire the Driver
Open the driver's terminal cover (if applicable).
Connect the driver's input wires to your home's power wires (typically live/neutral/ground, marked clearly on the driver). Use wire nuts or the included connectors to secure the connections tightly.
Connect the driver's output wires to the LED panel light's corresponding wires, following the polarity markings (positive to positive, negative to negative).
Tuck the driver neatly into the ceiling cavity above the cutout, making sure it's not pinched or crammed.
Step 3: Install the Light Fixture
Squeeze the two spring clips on the side of the panel light inward, then insert the light into the ceiling cutout.
Release the clips-they'll expand outward, gripping the ceiling and holding the light flush in place.
Give the light a gentle tug to confirm it's securely installed and won't fall out.
Step 4: Test Your New Light
Turn the power back on at the main panel.
Flip the light switch to see your bright, new panel light shine! If it doesn't turn on, double-check all wire connections and confirm the power is fully restored.

Our firm prides itself on owning its own factory, guaranteeing complete control over the production process and the quality of our goods. We are not only agents; we are manufacturers committed to offering our clients the most competitive rates available. We invite consumers to evaluate our samples first, as we are assured that the quality and pricing of our items are self-evident. Our dedication to excellence and client satisfaction compels us to consistently perform at our best and provide superior quality products.
Our address
3rd Floor, 5th Building, Hebei Industrial Park, Hualian Community, Longhua District, Shenzhen, China