In projects such as warehouses, parking lots, cold storage facilities, and factory workshops, a common question from procurement and installation teams is: Can "tri-proof" (waterproof, dustproof, and corrosion-proof) light fixtures be mounted directly onto concrete ceilings or steel beams, without the need for a suspended ceiling or additional structural support? The answer is yes-in most cases-but "direct mounting" does not mean "haphazard mounting." Concrete and metal beams differ significantly in terms of load-bearing capacity, surface flatness, and heat dissipation. An incorrect installation method can lead to issues ranging from loose fixtures or water ingress to the dangerous detachment and falling of the lights. Let's break down the requirements for both scenarios.
Why the design of tri-proof lights is well-suited for surface mounting
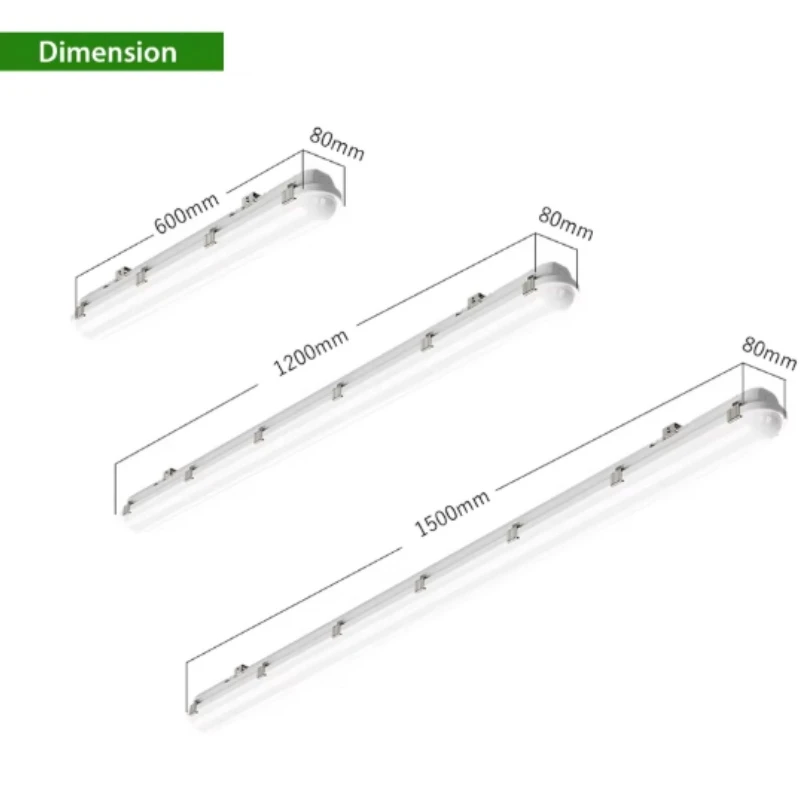
Tri-proof lights (designed to be waterproof, dustproof, and corrosion-proof) typically feature an integrated, elongated housing-often made of PC or a PC+ABS blend. These units are lightweight and include silicone gaskets between the diffuser (lens) and the base housing.
This design makes them naturally suited for direct surface mounting:
Lightweight and simple load requirements: A standard 1.2-meter fixture usually weighs only about 1–2 kilograms, requiring no complex load-bearing structures.
Built-in mounting points: The back of the housing typically includes pre-drilled mounting holes or comes with dedicated mounting clips, allowing for direct attachment to a flat surface.
In short, "direct mounting" is a feature accounted for in the product's original design; the key is simply ensuring the right mounting surface and using the appropriate hardware for fixation.
Direct mounting on concrete ceilings: Ensuring a secure installation
Concrete ceilings offer the most stable mounting surface, provided that the correct fasteners are used.
Common methods:
Expansion bolts + mounting clips: Drill holes into the concrete, insert expansion anchors, and then use screws to secure the mounting clips or the light fixture itself. This is the most common and reliable approach.
Direct fixation via housing holes: If the back of the fixture has pre-existing mounting holes, you can mark and drill holes in the concrete to align with them, allowing for a straightforward, one-step installation.
Important considerations:
Mark the drilling positions precisely according to the spacing of the fixture's mounting holes-do not rely on visual estimation. Otherwise, the fixture may be subjected to uneven stress once installed. The hole must be drilled to a sufficient depth, and the expansion anchor must be fully inserted into the concrete; otherwise, both load-bearing capacity and tensile strength will be compromised.
In older industrial facilities, the concrete surface may sometimes be loose or crumbly. In such cases, it is advisable to use longer expansion bolts or opt for chemical anchors instead.
If the ceiling surface is noticeably uneven, leaving gaps when the fixture is pressed against it, you should insert a gasket or apply sealant to level the contact area-do not attempt to "flatten" it by overtightening the fasteners.
Direct Installation on Metal Beams: Securing Fixtures Without Drilling
In steel-structure industrial facilities, lighting fixtures often need to be mounted on I-beams, H-beams, or C-channel purlins. A crucial principle-frequently overlooked-is that load-bearing beams should not be drilled into arbitrarily; doing so compromises structural integrity and may be prohibited by the building owner or the project designer.
More appropriate alternatives include:
Beam Clamps/Fasteners: Use clamps sized to match the beam flange width to secure the mounting bracket, eliminating the need for drilling.
Self-Tapping Screws: For thin-walled purlins or profiled steel (color-steel) panels, mounting clips can be secured using self-tapping screws. Ensure the screws are equipped with waterproof gaskets to prevent potential leaks.
Transition Brackets: If the beam surface is too narrow or the position is suboptimal, install a small cross-arm or mounting plate first, then attach the lighting fixture to that.
Important Notes for Metal Beams:
Clean any paint or rust from the metal surface; otherwise, the mounting clips may slip under load.
Distinguish between mechanical mounting and electrical connection. The fixture's grounding wire must be handled separately in accordance with relevant standards-do not assume that "mounting it on a steel beam" automatically provides a proper ground.
Scenarios Where Direct Surface Mounting Is Not Recommended
Direct surface mounting is not a universal solution. In the following situations, it is generally better to use suspension chains or rods instead:
High-Temperature Surfaces: For example, on metal beams located near drying equipment or furnaces, heat can be conducted to the fixture, negatively affecting the LED driver and accelerating light degradation (lumen depreciation). Environments with significant vibration: In workshops housing large stamping equipment or overhead cranes, persistent vibration can cause fasteners to loosen. In such cases, using suspension chains-ideally paired with anti-loosening features-provides a more secure installation.
Situations requiring lower mounting heights: In spaces with very high ceilings (such as large warehouses), mounting fixtures directly to the ceiling may result in insufficient illumination at the working level; suspension mounting should be used to lower the lights.
Surfaces with severe corrosion or crumbling (chalking): Such substrates cannot guarantee the necessary anchoring strength for fasteners and must be treated or repaired before installation.
Quick Pre-Installation Checklist
Before you begin, take two minutes to verify the following:
What is the mounting surface-concrete, a steel beam, or a thin metal sheet? Do you have the appropriate fasteners ready?
Do the mounting hole spacings on the fixture align with your intended anchor points?
Is the environment subject to high temperatures, intense vibration, or corrosive elements?
Are the waterproof cable glands and seals for the cable entry points on hand?
Has a dedicated grounding connection been accounted for?
Are the materials of the fasteners suitable for the specific environment?
While this checklist may seem simple, many instances of on-site rework occur precisely because one of these points was overlooked.
Summary
Returning to the initial question: "Tri-proof" (ruggedized/protected) lights can indeed be mounted directly onto concrete ceilings or metal beams-this is, in fact, one of their most common applications. The keys to success are:
For concrete ceilings, use expansion bolts or specialized clips, ensuring precise hole positioning and adequate depth.
For metal beams, prioritize the use of beam clamps or adapter brackets rather than drilling holes directly into load-bearing structural members.
Details such as waterproof cable entries, proper grounding, and the use of environment-appropriate fastener materials are critical factors that determine the service life of the lighting fixtures.
In environments characterized by high temperatures, strong vibrations, or excessive ceiling heights, suspension mounting is the more appropriate choice.
Need help selecting the right tri-proof lights and mounting accessories for your project?
Based on your specific installation environment (e.g., concrete, steel beams, or metal cladding), ceiling height, and required protection rating, we can recommend the ideal lighting models and installation solutions. We also provide a full range of compatible clips, brackets, and waterproof cable glands.