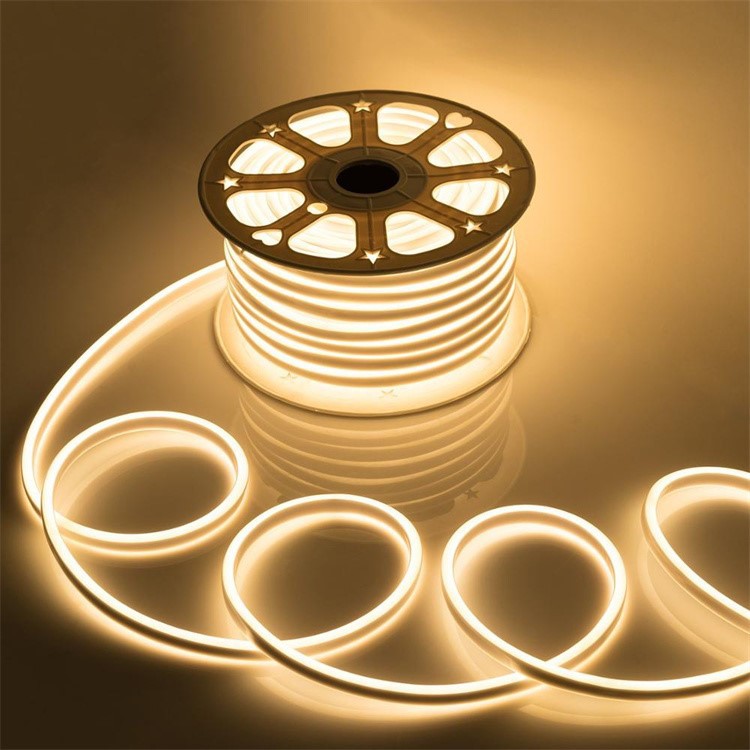
If you want to add a cool and unique touch to your home, LED neon light strips are a great option. In modern home interior design, ambient lighting plays a vital role in shaping spatial style, adjusting indoor atmosphere and enhancing home comfort. Unlike traditional single ceiling lights and wall lamps, LED neon light strips feature soft light texture, rich color options, flexible bending performance and ultra-thin body design, which can perfectly fit various home decoration styles, from minimalist modern style and trendy ins style to warm pastoral and high-end light luxury style. These strips are perfect for setting the mood for a party, creating a cozy atmosphere in your room, or simply adding some color to your décor. You can install them behind TV backgrounds, under bedside cabinets, along stair handrails, on ceiling edges and cabinet gaps, easily creating layered and textured home lighting effects. Whether you need dynamic colorful lighting for family holiday parties, warm soft lighting for daily rest, or personalized decorative lighting to enrich monotonous wall and space layout, LED neon light strips can meet all your needs. With a few simple steps, you can easily install LED neon light strips in your home without professional electrician skills or complicated construction tools, making it a friendly DIY home decoration project for every homeowner.
Step 1: Gather your materials
Before you start installing your LED neon light strips, you'll need to gather a few materials to ensure the installation process goes smoothly without interruptions caused by missing tools or accessories. Complete preparation is the premise of efficient and standard installation, which can also avoid repeated disassembly and secondary adjustment in the later stage. You'll need LED neon light strips, a power supply, and a connector. These are the core matching accessories for the normal operation of the light strips. It is worth noting that you need to select a power supply with matching voltage and power according to the specification and length of your LED neon light strips to avoid insufficient power supply or overload burnout of the light strips. The special connector supporting the light strips can ensure stable circuit connection and avoid poor contact and light flicker. You'll also need a cutter or scissors, a ruler, and tape or adhesive. Sharp and neat cutters or scissors can ensure flat and smooth cutting of the light strips, the ruler is used for accurate size measurement, and high-quality tape or special adhesive can ensure the firm fitting of the light strips. Make sure you choose the right size of light strips for the area you want to cover. It is recommended to measure the installation area in advance before purchasing the light strips, reserve a small amount of margin appropriately, and avoid the problem of insufficient length or redundant and messy accumulation of light strips, so as to ensure the installation effect is neat and beautiful.
Step 2: Clean the surface
Once you have all your materials, you need to clean the surface where you want to install the light strips. Many beginners easily ignore the surface cleaning link and directly paste the light strips, resulting in insecure pasting, falling off after a period of time, uneven fitting and other problems. The installation surface directly determines the sticking firmness and flatness of LED neon light strips, so surface treatment must be done carefully. Make sure the surface is dry and free of any dirt or debris. Dust, floating wool, residual stains, oil stains and tiny particles on walls, wood surfaces, glass and metal surfaces will form a gap between the light strip and the installation surface, reducing the adhesion of the adhesive. You can use a clean soft cloth to wipe the surface repeatedly. If there are stubborn oil stains, you can wipe them with a little neutral detergent, and wait for the surface to be completely dry before subsequent operations. Never install light strips on wet, dusty or dirty surfaces, which will not only affect the installation stability, but also easily cause water vapor and dirt to corrode the light strip circuit and shorten the service life of the LED neon light strips.
Step 3: Measure and cut the strips
Using your ruler, measure the length of the area where you want to install the light strips. Accurate measurement is the key to a perfect fit of the light strips. You need to measure the straight length, curved radian and overall boundary of the installation area multiple times to ensure accurate data. Then, use your cutter or scissors to cut the strips to the desired length. It is important to note that LED neon light strips have fixed cutting points, and you must cut along the reserved cutting marks on the light strips instead of cutting randomly, so as to avoid damaging the internal circuit and causing local non-lighting of the light strips. Make sure you cut the strips carefully, so they fit perfectly on the surface. Slow and stable cutting can ensure a flat incision without burrs, which is convenient for subsequent connector installation and overall fitting. After cutting, you can slightly trim the edge of the incision to keep the light strip neat, ensuring that the cut light strip can completely match the size of the installation area, no sagging, no curling, and present a neat and uniform installation effect.
Step 4: Attach the connector
Attach the connector to the end of the LED neon light strips that you want to connect to the power supply. The connector is the key bridge for the light strip to connect to the power supply and realize power conduction. After cutting the light strip, the internal circuit contact point at the incision is exposed, and the connector needs to be installed in time for protection and connection. You need to align the positive and negative contacts of the light strip with the conductive pieces inside the connector to avoid reverse connection leading to no light or circuit damage. Make sure the connector is properly attached and secure. After alignment, clamp the connector tightly to make the internal conductive pieces fully fit the light strip contacts, shake it slightly to confirm no looseness or deviation, ensure stable electrical connection, and prevent poor contact caused by loose connectors during subsequent use, which leads to light flicker, intermittent lighting and other faults.
Step 5: Power up the strips
Once you have attached the connector, you can connect the LED neon light strips to the power supply. Before formal pasting and fixing, it is essential to conduct a pre-power-on test, which is an important step to check whether the light strip and accessories work normally and avoid rework after installation. Make sure the power supply is plugged into an outlet and turned on. You should see the light strips turn on. Observe the lighting state of the whole light strip carefully to check whether the light is uniform, whether there is dark area, flicker or non-lighting section, and confirm that the color and brightness of the light strip are normal. If any abnormal problems are found, power off immediately to check the connector connection and light strip circuit, and troubleshoot the faults in time. Only after confirming that the light strip works normally can the subsequent formal pasting and fixing operation be carried out, which effectively guarantees the installation quality.
Step 6: Attach the strips to the surface
Using tape or adhesive, attach the LED neon light strips to the surface. Most LED neon light strips are designed with self-adhesive backing tape, which is convenient for pasting installation. For surfaces with poor flatness or insufficient adhesion, you can match with auxiliary fixing tape or special structural adhesive to enhance firmness. Make sure the strips are properly aligned and secure. You need to start pasting from one end of the installation area, straighten the light strip slowly, adjust the angle and position in real time, ensure that the light strip is completely fitted with the surface without deviation, wrinkles, curling and bubbles. You can use tape or adhesive to hold the strips in place as they adhere to the surface. Press the light strip firmly along the whole section after pasting to make the adhesive fully contact the installation surface, enhance the adhesion effect, and avoid the light strip falling off due to incomplete fitting in the later long-term use. For curved and corner positions, bend the light strip gently according to the radian to ensure smooth and neat transition without dead folding.
Step 7: Enjoy your new lights
Once you have installed your LED neon light strips, you can sit back and enjoy the new ambiance they bring to your home. After all installation and fixing work is completed, you can tidy up the wires and tools, turn on the light strips, and appreciate the brand-new home lighting effect brought by DIY installation. LED neon light strips can add a strong sense of fashion and warmth to the home space, break the dullness of traditional single lighting, and create a unique decorative atmosphere. Whether you have installed them in your bedroom, living room, or dining room, these light strips are sure to add a cool and unique touch to your décor. The soft neon light can create a warm and relaxing resting atmosphere for the bedroom, a fashionable and high-end visual effect for the living room, and a warm and romantic dining atmosphere for the dining room. It can not only beautify the home space, but also improve the overall grade and texture of interior decoration, making your ordinary home have a personalized and trendy sense of design.
In conclusion, the process of installing LED neon light strips is simple and easy, totally suitable for novice homeowners with no professional installation experience. Compared with other complex home lighting transformation projects, LED neon light strip installation has low threshold, simple operation and no need for professional construction equipment. With the right materials and a little patience, you can have your light strips installed in no time. The whole process only needs simple material preparation, surface cleaning, accurate measurement and cutting, standard wiring connection and firm pasting fixation, which can be completed efficiently in a short time. Just remember to measure carefully, ensure your surfaces are clean, and use proper adhesive to hold your strips in place. These key details determine the firmness, beauty and service life of the light strip installation, and every step needs to be treated carefully. Soon, you'll be enjoying the ambiance of your new LED neon light strips, experiencing the unique charm of personalized home lighting, and easily upgrading the decorative effect and comfortable atmosphere of your home space.

How To Cooperate With Us?
Because of our own facilities, we have complete control over the production process and the quality of our goods, which makes us very pleased. We are committed to giving our clients the greatest price since we are manufacturers rather than just brokers. We encourage clients to evaluate our samples first since we are certain that the cost and quality of our items are transparent. Our dedication to excellence and client happiness motivates us to consistently provide superior products.
Our address
3rd Floor, 5th Building, Hebei Industrial Park, Hualian Community, Longhua District, Shenzhen, China