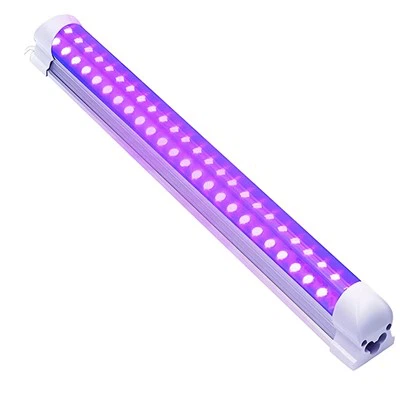
Linear batten lights are an excellent addition to modern home and commercial lighting.With their slim, streamlined body, minimalist silhouette and ultra-flat design, these lighting fixtures have become a mainstream lighting choice for contemporary interior decoration, perfectly fitting the simple and advanced aesthetic of modern spaces. They offer a sleek and sophisticated look while providing efficient and functional lighting.Unlike traditional bulky ceiling lights and single-point bulb lights, linear batten lights deliver uniform, wide-area, flicker-free lighting, which can effectively eliminate dark corners on shelves, display cabinets, wall shelves and storage areas. Whether used for residential shelf accent lighting, kitchen cabinet lighting, bookcase fill lighting, or commercial store display shelf lighting, office partition auxiliary lighting, they can greatly improve space brightness and layering. Installing shelf linear batten lights is an easy and straightforward process that can be completed in a few simple steps.Many people mistakenly believe that electrical lighting installation requires professional electrician skills and complex construction processes, but shelf linear batten lights are designed for household and self-installation scenarios, with standardized structures and simple wiring logic. As long as you follow the formal process and operate carefully, ordinary DIY enthusiasts can finish the installation independently. Here's how to do it, with detailed step-by-step guidance to help you safely and successfully complete the whole installation work.
1. Gather the necessary tools and materials
Before you begin, make sure you have all the tools and materials you'll need. Adequate preparation is the basis for smooth installation, which can effectively avoid construction interruptions caused by missing tools, and also ensure the accuracy and safety of each operation step.You'll need a drill, screws, a measuring tape, wire strippers, and a screwdriver.Each tool has an irreplaceable function in the installation process: the drill is used to drill fixed mounting holes on walls, shelf panels or cabinet surfaces to facilitate bracket installation; matching screws are the key to fixing brackets and lamp bodies firmly; the measuring tape is responsible for all pre-installation positioning and spacing measurement to ensure neat and standardized installation effects; wire strippers are dedicated tools for safe wire stripping, which can avoid wire core damage caused by random stripping; the screwdriver is used for screw tightening and later fixture fixing and debugging. It is recommended to prepare multi-functional screwdrivers with cross and flat heads to adapt to different types of accessory screws of the lamp kit. You'll also need the batten light kit, which should include the light fixture, mounting brackets, and wiring.Before formal construction, be sure to fully check the complete set of accessories of the batten light kit, carefully count the number of light fixtures, confirm whether the mounting brackets are complete and undamaged, and check whether the supporting wiring, wire nuts, fixing screws and other small accessories are fully equipped. At the same time, inspect the surface of the linear batten light fixture to confirm there is no extrusion damage, shell cracks or circuit faults during transportation. If any accessories are missing or the lamp body is damaged, replace or supplement them in advance to ensure the installation process can be carried out continuously without affecting the construction progress.
2. Determine the placement of your batten lights
Choose the location where you want to install your batten lights. Scientific and reasonable position planning directly determines the final lighting effect and aesthetic degree of the shelf linear batten lights. Different installation positions correspond to different lighting purposes: installing under the shelf can illuminate the desktop and shelf storage area, installing on the shelf back plate can highlight display items, and installing on the side of the cabinet can fill the overall space light. Before confirming the position, you need to combine the shelf structure, space layout and daily lighting needs to select the most appropriate installation area, avoiding blind installation that leads to limited lighting range or blocked light.Decide how many lights you will use, as well as the spacing between them. For long strip shelves, multi-lamp combined installation is usually required to ensure uniform overall light distribution and avoid local bright and dark alternation. According to the length of the shelf and the luminous coverage of a single linear batten light, reasonably plan the number of lamps and the spacing between each lamp. Too large spacing will lead to insufficient intermediate lighting and dark gaps, while too dense arrangement will cause light overlap, excessive brightness and waste of resources.Use a measuring tape to ensure that they are evenly spaced and aligned.After preliminarily planning the installation position and quantity, use a measuring tape for precise measurement and marking. Mark the installation center point and bracket fixing position of each lamp on the shelf or wall with a pencil, accurately measure the distance between adjacent lamps, and fine-tune the position to ensure all linear batten lights are kept horizontal, uniform in spacing and consistent in height. This precise positioning operation can make the overall installation layout neat and orderly, greatly improving the modern and advanced sense of space lighting, and avoiding the messy visual effect caused by uneven installation.
3. Install the brackets
Once you've determined the placement of your batten lights, you'll need to install the mounting brackets. After preliminarily planning the installation position and quantity, use a measuring tape for precise measurement and marking. Mark the installation center point and bracket fixing position of each lamp on the shelf or wall with a pencil, accurately measure the distance between adjacent lamps, and fine-tune the position to ensure all linear batten lights are kept horizontal, uniform in spacing and consistent in height. This precise positioning operation can make the overall installation layout neat and orderly, greatly improving the modern and advanced sense of space lighting, and avoiding the messy visual effect caused by uneven installation.Use a drill and screws to secure the brackets into the wall.First, aim the drill at the pre-marked fixing hole position for punching. According to the material of the installation base surface (wooden shelf, gypsum board wall, solid wall), adjust the drilling depth and force to avoid excessive drilling damage to the shelf and wall structure. After the drilling is completed, put the brackets in the designated position, align the fixing holes, and fix the brackets firmly with matching screws. During the fixing process, tighten the screws evenly to prevent the brackets from tilting and shifting due to uneven stress. Make sure the brackets are level and properly aligned, as they will support the weight of the batten lights.After all brackets are installed, use a level tool to check the levelness of each bracket one by one. If there is slight deviation, adjust the screw tightness in time to correct the position. All brackets must be kept on the same horizontal line with consistent spacing and neat alignment. Only in this way can the subsequent linear lamp body be installed smoothly and flatly, avoiding the lamp body tilting, shaking or falling off due to unqualified bracket installation, and fully ensuring the long-term safe and stable use of the shelf linear batten lights.

4. Connect the wiring
Next, you'll need to connect the wiring to your batten lights. Wiring connection is the most critical link in the whole installation process, which is related to the power supply safety and normal lighting of the lamps. It is necessary to strictly abide by electrical safety operation specifications. Before wiring, please be sure to completely cut off the indoor power supply of the construction area to avoid electric shock accidents and circuit short-circuit risks caused by live operation.Follow the manufacturer's instructions carefully to ensure that the wiring is correctly connected.Different models of shelf linear batten lights have unified standard wiring specifications, and the manufacturer's detailed wiring diagram and operation steps are attached in the product manual. You must read the instructions carefully before operation, clarify the corresponding functions of each wire, and do not connect wires arbitrarily by experience, so as to avoid wrong wiring leading to lamp burnout, circuit failure or potential safety hazards. You'll need to strip the ends of the wires, connect the live, neutral, and earth wires, and secure them with wire nuts.Use professional wire strippers to gently strip the insulating rubber at the end of the power cord and lamp cord, exposing an appropriate length of copper wire core. Be careful not to scratch or break the wire core during stripping, so as not to affect the power conduction effect. After stripping the wires, connect the live wire, neutral wire and earth wire in one-to-one correspondence according to the electrical standard: live wire to live wire, neutral wire to neutral wire, earth wire to earth wire. After the wire cores are tightly twisted and connected, wrap and fix them firmly with matching wire nuts to ensure the wiring interface is tight and not loose, avoiding poor contact, electric leakage and circuit virtual connection problems in the later use process.
5. Attach the light fixture to the brackets
Once the wiring is connected, you can attach the batten light fixture to the mounting brackets.After confirming that all wiring connections are correct, firm and safe, start the lamp body installation work. Gently lift the linear batten light fixture, aim the reserved fixing card slot or mounting hole at the installed brackets, and slowly fit the lamp body on the brackets. During the fitting process, adjust the position slightly to ensure the lamp body is completely matched with the brackets without deviation or jitter. Secure it in place using screws provided with the kit.After the lamp body is positioned accurately, take the special fixing screws matched with the lamp kit, and fix the lamp fixture on the mounting brackets one by one. When tightening the screws, keep the force uniform to prevent the lamp shell from being deformed or damaged by excessive force, and also ensure that each screw is tightened in place to avoid the lamp body falling off due to loose screws in the later stage. Make sure your light fixture is level and properly secured before proceeding.After the installation is completed, check the overall levelness and firmness of the lamp body again. Gently shake the lamp body slightly to confirm there is no shaking or displacement, observe whether the lamp body is kept horizontal and consistent with the installation baseline, and check whether all fixing positions are firm and effective. Only after confirming that the lamp fixture is installed in place and meets the standard can we carry out the final power-on test step.
6. Turn on the power
Before turning on the power to your new batten lights, double-check your wiring connections.The final power-on inspection is an indispensable safety step, which can eliminate potential wiring hidden dangers in advance. Carefully check all wiring interfaces again to confirm that the live wire, neutral wire and earth wire are correctly connected without wrong connection, reverse connection or virtual connection, and all wire nuts are tightly fixed without exposed wire cores. At the same time, check whether the lamp body and brackets are installed firmly and whether there is any abnormal extrusion or circuit damage. Once you're confident that everything is in order, flip the switch and enjoy your new lighting!After confirming that all installation steps and wiring operations are error-free, you can turn on the indoor power supply of the lighting area, flip the control switch of the linear batten lights, and test the lighting effect. Observe whether the lamp lights up normally, whether the light is uniform and stable without flickering, strobing or abnormal darkness. If the lighting is normal, it means the whole installation work is completed successfully.
In conclusion, installing shelf linear batten lights can be done with a few simple steps, but should be done with care and attention to detail.The whole installation process includes tool preparation, position planning, bracket fixing, wiring connection, lamp body installation and power-on test. The steps are clear and easy to operate, but every link requires careful and standardized operation. Any careless operation may affect the installation effect and even bring safety risks. When done correctly, these lights can offer excellent lighting and a sleek modern look to any space.With their uniform and soft light, simple and stylish appearance, shelf linear batten lights can effectively upgrade the lighting grade of homes and commercial spaces, brighten shelf display areas, enrich space light and shadow layers, and create a neat, advanced and comfortable modern lighting environment for all kinds of decorative scenes.

How To Cooperate With Us?
Because of our own facilities, we have complete control over the production process and the quality of our goods, which makes us very pleased. We are committed to giving our clients the greatest price since we are manufacturers rather than just brokers. We encourage clients to evaluate our samples first since we are certain that the cost and quality of our items are transparent. Our dedication to excellence and client happiness motivates us to consistently provide superior products.
Our address
3rd Floor, 5th Building, Hebei Industrial Park, Hualian Community, Longhua District, Shenzhen, China