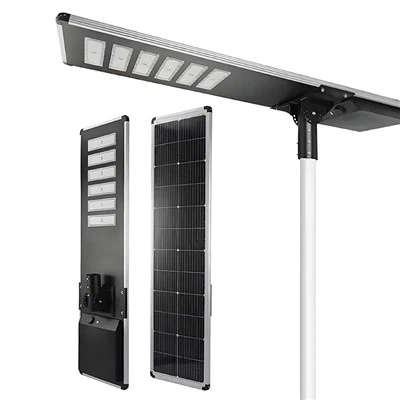
Outdoor LED floodlights are widely used in courtyard lighting, factory exterior walls, stadium lighting, billboard supplemental lighting, and residential roads, offering high brightness and waterproof durability. Many buyers and installation personnel frequently inquire about standard installation procedures. Incorrect installation can not only reduce the lifespan of the lights but also pose safety hazards such as electrical leakage, detachment, water ingress, and short circuits. This article outlines a standardized and safe outdoor floodlight installation process, including preliminary preparation, step-by-step operation, debugging and inspection, and key points to avoid installation pitfalls, enabling even beginners to successfully complete the installation.
Essential Tools and Pre-Installation Inspection
Supporting Tools
Impact drill, expansion bolts, wrench, waterproof junction box, insulating tape, waterproof putty, wire stripper, spirit level, measuring tape.
Lighting Fixture and Environmental Inspection
Confirm the lighting fixture's protection rating is IP65 or higher, suitable for outdoor rain and dusty environments;
Check the lighting fixture's voltage specifications, distinguishing between 220V high-voltage and 12V/24V low-voltage models. Low-voltage models require a transformer in advance;
Inspect the lamp body bracket, screws, and seals for damage, and ensure the lampshade is free of cracks;
Disconnect the main power supply before installation. Never operate outdoors with power on to avoid the risk of electric shock;
Confirm the wall/pole's load-bearing capacity is sufficient. Reinforce loose walls to prevent the lighting fixture from falling.
Standard Step-by-Step Installation Process for Outdoor LED Floodlights
Location and Drilling: Mark installation points with a tape measure, calibrate the level with a spirit level, drill holes with an impact drill, and insert expansion tubes.
Bracket Fixing: Attach the matching metal bracket to the wall/pole, tighten the expansion screws to ensure the bracket is stable.
Light Fixture Fixing: Secure the floodlight base to the bracket, leaving the adjustment screws loose for later adjustment of the beam angle.
Cable Insertion: Thread the power cord through the waterproof connector at the rear of the light fixture, tighten the waterproof nut to prevent rainwater from seeping into the light body.
Waterproof Wiring: Connect the phase wire, neutral wire, and ground wire separately, and store them all in the outdoor waterproof junction box.
Angle Adjustment: Briefly power on the light fixture to adjust the vertical and horizontal beam range. Once the light intensity is satisfactory, tighten the adjustment screws.
Sealing and Finishing: Apply waterproof sealant to the junction box gaps and cable joints to prevent rainwater damage.
Key Points for Two Mainstream Installation Methods: Wall-mounted and Pole-mounted
Method 1: Wall-mounted Installation (Courtyard, Exterior Wall, Billboard)
Solid cement walls are preferred. Hollow walls require extended expansion bolts or reinforced steel plates.
Recommended installation height: 2.5–6 meters. Too high and the light will be insufficiently bright; too low and it will be easily damaged by impacts.
Tilt the light fixture slightly downwards at 5°–10° to prevent rainwater from accumulating at the edges of the lampshade and reduce the probability of water seepage.
Method 2: Pole-mounted Installation (Road, Stadium, Factory Pole)
Match the appropriate size of the pole clamp to the pole's thickness. Use double clamps for secure fixing to prevent the light fixture from swaying in strong winds.
Run the cable along the pole conduit wall and secure it with cable clips to prevent the cable from dangling and pulling on the waterproof connector of the light fixture.
Leave a wiring access port at the bottom of the pole for easy maintenance and replacement later.
Key Steps for Waterproofing Wiring
80% of outdoor lighting fixture failures stem from water ingress into the wiring; waterproofing is paramount:
Distinguish between three wires: Live (L), Neutral (N), and Ground (PE). The ground wire must be reliably grounded for lightning and leakage protection.
Never directly wrap wires in the open; all connections must be placed in sealed waterproof junction boxes.
Insert drip traps in the cables to allow rainwater to drip away, preventing backflow into the fixture.
After wiring, fill the junction box with waterproof sealant to seal all gaps and prevent moisture ingress.
Low-voltage 12V/24V transformers must be placed in a rainproof area and must not be exposed to rain.
Post-Installation Debugging and Safety Inspection
Reconfirm all screws are tightened, and that the brackets and light fixtures are not loose or wobbly.
Power-on test: Observe whether the light emits light normally, and whether there is flickering or abnormal noise.
Check the illumination range from multiple angles, and fine-tune the lamp's tilt angle as needed.
Check that all waterproof joints and junction boxes are completely sealed, with no exposed gaps.
Power on under no-load for 30 minutes; if the lamp body casing does not become abnormally hot to the touch, the installation is considered successful.
Common Mistakes and Avoidance Techniques in Outdoor Floodlight Installation
Not using waterproof wiring, exposed wires: Short circuits can burn out the light fixture in the short term, and there is a risk of electric leakage in rainy weather. Waterproof boxes must be used.
Installing the light fixture horizontally upwards: Rainwater accumulates in the gaps of the lamp cover, and long-term water seepage can damage the driver.
Omitting grounding connection: Lightning strikes are more likely to damage the light fixture during thunderstorms, posing a risk of electric shock.
Loose bracket screws: Light fixtures may shift or fall in strong winds, injuring pedestrians.
Multiple light fixtures sharing a thin cable: Insufficient load and unstable voltage can cause flickering and shorten the lifespan of the light fixture.
Summary
The core of outdoor LED floodlight installation consists of three main aspects: fixing, waterproof wiring, and angle adjustment. Waterproofing and grounding are crucial for safety and durability. Wall mounting and pole clamp installation methods are suitable for different outdoor scenarios. Standardized construction can effectively prevent water ingress, short circuits, lamp detachment, and leakage, significantly extending the lifespan of the lamps.
Before installation, ensure proper power disconnection and strictly follow the waterproof wiring procedure, avoiding common mistakes such as upward installation and bare wire connections. Whether it's a small floodlight for home or garden use, or a high-powered floodlight for a sports field, stable and long-term operation is guaranteed.
If you need outdoor LED floodlights of different wattages, IP66 high waterproof rating, and adjustable brackets for garden, construction site, sports field, or billboard lighting projects, we can provide sample testing, bulk quotes, and complete sets of accessories including waterproof junction boxes, clamp brackets, and low-voltage transformers. Please feel free to contact us to obtain product parameters, a list of installation accessories, and engineering lighting solutions.