Eye strain and regular headaches have become widespread problems in the contemporary office, where professionals spend eight to ten hours a day in front of screens and under artificial lighting. According to a 2024 American Optometric Association (AOA) research, 75% of office workers report having digital eye strain, and 40% mention headaches that are directly related to dim workplace illumination. While many companies use LED lighting to save energy expenses, they often fail to consider an important aspect: anti-glare technology. A well-meaning lighting update may become a daily cause of pain if the incorrect anti-glare panel is used, which can worsen eye fatigue, lower productivity, and even affect long-term eye health. This blog examines the reasons why poor anti-glare panels lead to headaches, the fundamental technology that addresses this issue, how to choose the best panel for your workplace, the concrete advantages of selecting a high-quality anti-glare LED panel, and the proper usage scenarios and installation techniques to optimise its efficacy. By the end, you'll see why purchasing the ideal anti-glare panel is a wise investment in your team's well-being, output, and general job happiness rather than just a comfort update.
Core Technology for Headache Prevention
Harsh glare and flickering light, which both overstimulate the eyes and induce strain in the muscles of the face and neck, are the main causes of headaches caused by workplace lighting. A premium anti-glare LED panel solves these issues by combining cutting-edge, scientifically validated technologies that complement one another to provide a cosy, aesthetically pleasing lighting environment. In contrast to inexpensive panels that use simple diffusers or insufficient anti-glare coatings, our high-end anti-glare LED panel uses three key technologies to remove headache triggers.
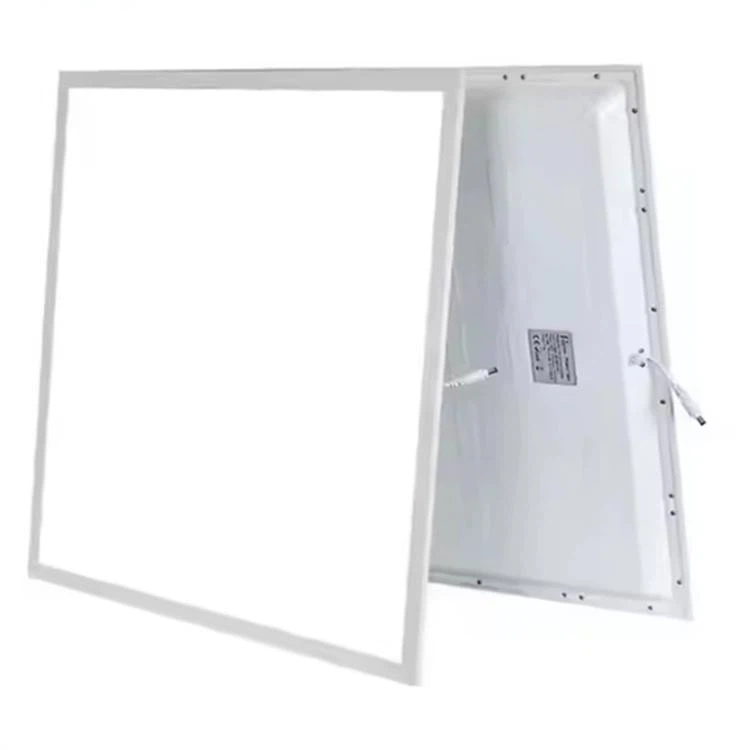
First, it has a micro-prismatic structure on a multi-layered light guiding plate (LGP). In order to eliminate hotspots and lessen the intensity of direct light that produces glare, this structure is designed to refract and disperse light uniformly over the whole panel surface. The LGP's high-transmittance optical-grade acrylic construction guarantees that light is dispersed evenly without losing brightness, which is essential for maintaining a well-lit workstation while reducing eye strain. The multi-layer design scatters light at numerous angles, preventing direct light from entering the eyes at sharp angles that induce strain and squinting, in contrast to typical panels that depend on a single diffuser layer.
Second, low-blue-light LED chips that meet the International Electrotechnical Commission's (IEC) 62471 standard for photobiological safety are used in the panel. Digital eye strain, which causes headaches, dry eyes, and impaired vision, is known to be caused by blue light, particularly in the 415–455 nm range. In comparison to ordinary LED panels, our LED chips are calibrated to decrease hazardous blue light emissions by 30% while retaining a high colour rendering index (CRI) of 90+ to guarantee correct colour perception, which is crucial for jobs like graphic design, document editing, and video conferencing.
Third, the panel has a flicker-free constant current driver (flicker frequency > 1000Hz). Even at levels that are undetectable to the unaided eye, flicker may lead to headaches and eye fatigue over time because the ciliary muscles in the eyes are always adjusting to the minute variations in light intensity. Our constant current driver completely removes flicker and lessens the cognitive strain on the eyes by ensuring a steady, continuous light output. Because it avoids the cumulative eye strain that causes afternoon headaches and diminished attention, this technology is especially crucial for businesses with lengthy workdays.
How to Choose the Right Anti-Glare Panel Light
It takes more than simply picking a product with the label "anti-glare" to choose the best anti-glare panel light for your workplace; you also need to assess important technological features and match them with your workspace requirements. Many low-quality panels don't satisfy the requirements to avoid headaches and instead employ deceptive marketing words like "anti-glare" or "eye-friendly." The essential elements to take into account when choosing an anti-glare panel are listed below, along with detailed instructions to assist you steer clear of typical errors.
Check the light dispersion and anti-glare rating first. Seek for panels with a UGR (Unified Glare Rating) of < 19, which is the International Organization for Standardization's (ISO) industry standard for workplace lighting. Even in areas with reflecting surfaces (such computer displays, desks, and windows), a UGR ≤ 19 guarantees that glare is maintained to a minimum. Check the panel's beam angle as well. To guarantee even light distribution, use a broad beam angle (120°–150°), since small beam angles may produce sharp shadows and hotspots that exacerbate eye strain. Steer clear of panels with a UGR greater than 22, since they will probably result in headaches and significant glare.
Second, give low-blue-light certification top priority. Seek for panels that meet IEC 62471 standards and have been certified by respectable organisations as "Low Blue Light" (LBL) or "Eye Comfort." Steer clear of panels that don't provide precise blue light emission statistics as they can have dangerous amounts of blue light. Check the colour temperature as well. For offices, a colour temperature of 4000K (neutral white) is optimal since it balances warmth and brightness and lessens eye strain compared to warmer temperatures (3000K-) that might make you sleepy or colder temperatures (5000K+) that can be harsh.
Third, assess the flicker performance of the panel. Request the flicker frequency specification; panels with a flicker frequency of 1000 Hz or more are flicker-free, whereas those with lower frequencies (50 Hz–60 Hz) can produce perceptible flicker that might induce headaches. Holding a smartphone camera up to the panel is another way to check for flicker; if you notice horizontal lines on the screen, the panel has a lot of flicker and should be avoided. Additionally, because constant voltage drivers are more likely to flicker, consider panels with a constant current driver.
Fourth, take into account the panel's longevity and construction quality. A sturdy aluminium frame for heat dissipation is essential for a high-quality anti-glare panel since it prolongs the life of the LED chips and keeps them from overheating, which over time may result in colour shift and decreased performance. Instead of using cheap plastic, which may yellow and deteriorate over time and reduce light output and increase glare, the light guide plate should be manufactured of optical-grade acrylic. Lastly, look for a guarantee that lasts at least five years; this shows that the maker is confident in the product's performance and longevity.
Benefits of Using This Anti-Glare Panel Light
Investing in our high-quality anti-glare LED panel offers a number of observable advantages that enhance both corporate results and staff well-being in addition to lessening headaches. The panel is a high-return investment for any workplace setting since these advantages are supported by research and practical testing.
The most immediate advantage is a significant decrease in headaches and eye strain. The panel produces a pleasant lighting environment that enables workers to work for long periods of time without pain by removing glare, flicker, and harmful blue light. According to a 2023 University of Michigan research, workplaces that installed high-quality anti-glare LED panels had a 28% boost in self-reported productivity and a 45% decrease in employee complaints about headaches and eye strain. This is due to the fact that less eye strain enables workers to concentrate better on their work, which lowers mistakes and boosts productivity.
Second, the panel enhances general wellbeing and the quality of sleep. By inhibiting the generation of melatonin, harmful blue light from conventional LED panels may throw off the body's circadian cycle, resulting in restless nights and exhaustion throughout the day. This interruption is reduced by our low-blue-light design, which helps workers feel more awake throughout the daytime and sleep better at night. In addition to lessening headaches, getting more sleep also enhances mood, decreases stress levels, and lowers the chance of developing long-term health problems, all of which support a happier, healthier workforce.
Third, long-term cost reductions are provided by the panel. Premium anti-glare panels are far more durable and energy-efficient than low-quality ones, even if they may cost more up front. Our panel lowers monthly power costs by using high-efficiency LED chips that use 30% less energy than conventional LED panels. Furthermore, the panel's lifetime of more than 50,000 hours, or more than ten years of everyday usage, eliminates the need for regular bulb replacements and maintenance expenses. Over time, this results in a reduced total cost of ownership, making it an affordable option for companies of all sizes.
Fourth, the panel improves the atmosphere at work as a whole. Its ultra-thin, sleek form (only 1 cm thick) blends in well with any workplace décor, giving the workstation a contemporary, clean appearance. The workplace looks better and is more welcoming to both customers and staff thanks to the consistent, gentle light. Furthermore, the high CRI (90+) guarantees accurate colour presentation, which is crucial for jobs like graphic design, photography, and video editing, lowering mistakes and raising the calibre of output.
Lastly, the panel is in favour of sustainability. Its energy efficiency lowers carbon emissions, and it is constructed from recyclable, environmentally friendly materials. Businesses may improve employee well-being and lessen their environmental impact by selecting our anti-glare panel, which benefits the environment and the company alike.
Correct Usage Scenarios and Installation Methods
To maximize the effectiveness of the anti-glare panel and ensure it delivers the full range of benefits, it is critical to use it in the right scenarios and follow proper installation methods. Below is a detailed guide to usage scenarios and step-by-step installation instructions, designed to be easy to follow even for non-professionals.
Correct Usage Scenarios
Our anti-glare LED panel is designed specifically for office environments, but it is also suitable for a range of other commercial and residential spaces where comfort and eye protection are priorities. The key usage scenarios include:
• Open-plan offices: Ideal for large, open workspaces with multiple desks and computer screens, as the wide beam angle and uniform light distribution eliminate glare across the entire space. The neutral white color temperature (4000K) provides bright, focused light that supports productivity without causing strain.
• Private offices and meeting rooms: Perfect for spaces where focused work and presentations take place. The anti-glare design ensures that light does not reflect off presentation screens or whiteboards, making it easier for participants to see and engage. The adjustable color temperature (3500K-5000K) allows you to switch between warm and cool light depending on the task-warm light for collaborative meetings, cool light for focused work.
• Home offices: An excellent choice for remote workers who spend long hours at their desks. The low-blue-light design reduces eye strain during extended screen time, and the sleek design fits seamlessly into home decor. It is also suitable for home study rooms, where students can work without discomfort.
• Commercial spaces: Suitable for retail stores, reception areas, and waiting rooms, where comfortable lighting enhances the customer experience. The uniform light distribution highlights products and creates an inviting atmosphere, while the anti-glare design ensures that customers and employees are not distracted by harsh light.
Note: The panel is not recommended for outdoor use or spaces with excessive moisture (such as bathrooms or kitchens), as it is not waterproof. For humid environments, we offer a separate waterproof anti-glare panel designed for those spaces.
Installation Methods
The anti-glare panel is designed for easy installation, compatible with standard drop ceilings (T-bar ceilings) and surface mounting. Below are step-by-step instructions for both installation methods, along with safety precautions to ensure a smooth, safe process.
Tools needed: Ladder, screwdriver, wire stripper, electrical tape, and a voltage tester.
Step 1: Turn off the power supply to the ceiling lights at the circuit breaker. Use a voltage tester to confirm that there is no electricity flowing to the installation area-safety is the top priority.
Step 2: Measure the size of the drop ceiling grid to ensure the panel fits. Our panels are available in standard sizes (600x600mm, 600x1200mm), which are compatible with most office drop ceilings. If your grid is a non-standard size, contact our customer service for custom options.
Step 3: Remove the existing light panel or ceiling tile from the grid. Carefully disconnect the wiring from the old light, taking note of the positive (live) and negative (neutral) wires-this will make it easier to connect the new panel.
Step 4: Connect the wiring of the new anti-glare panel to the ceiling wiring. Match the positive wire (usually red or black) of the panel to the positive wire of the ceiling, and the negative wire (usually white or blue) to the negative wire. Use wire nuts to secure the connections, and wrap electrical tape around the nuts to prevent short circuits.
Step 5: Gently place the panel into the drop ceiling grid, ensuring that it fits securely and is level. Press down on the edges of the panel to lock it into place-there should be no gaps between the panel and the grid.
Step 6: Turn the power back on at the circuit breaker and test the panel. Ensure that the light turns on, there is no flicker, and the light distribution is uniform. If you notice any issues (e.g., flickering, dim light), turn off the power and check the wiring connections.
Tools needed: Ladder, drill, screwdriver, wall anchors, wire stripper, electrical tape, and a voltage tester.
Step 1: Turn off the power supply at the circuit breaker and use a voltage tester to confirm no electricity is present.
Step 2: Mark the installation location on the ceiling using a pencil. Ensure that the location is level and free from any obstacles (e.g., ceiling joists, wiring).
Step 3: Attach the mounting bracket (included with the panel) to the ceiling using the drill and wall anchors. Ensure that the bracket is securely fastened and level-this will prevent the panel from sagging.
Step 4: Connect the panel's wiring to the ceiling wiring, following the same steps as drop ceiling installation (match positive and negative wires, secure with wire nuts and electrical tape).
Step 5: Attach the panel to the mounting bracket using the included screws. Ensure that the panel is level and securely fastened-there should be no movement when gently pressed.
Step 6: Turn the power back on and test the panel. Check for flicker, uniform light distribution, and proper functionality.
Installation Safety Precautions
• Always turn off the power before starting installation to avoid electrical shock.
• Use a ladder that is stable and tall enough to reach the ceiling safely-do not stand on chairs or unstable surfaces.
• If you are not comfortable with electrical work, hire a professional electrician to install the panel.
• Ensure that the panel is installed in a dry, well-ventilated area-avoid areas with excessive moisture or heat.
• Do not modify the panel's wiring or components, as this can void the warranty and create safety hazards.

How To Cooperate With Us?
Our firm prides itself on owning its own factory, guaranteeing complete control over the production process and the quality of our goods. We are not only agents; we are manufacturers committed to offering our clients the most competitive rates available. We invite consumers to evaluate our samples first, as we are assured that the quality and pricing of our items are self-evident. Our dedication to excellence and client satisfaction compels us to consistently perform at our best and provide superior quality products.
Our address
3rd Floor, 5th Building, Hebei Industrial Park, Hualian Community, Longhua District, Shenzhen, China